I didn't think much about this when I did it, but I mentioned it to someone on here and they seemed taken with it..... so eventually I've got some photos together for a thread.
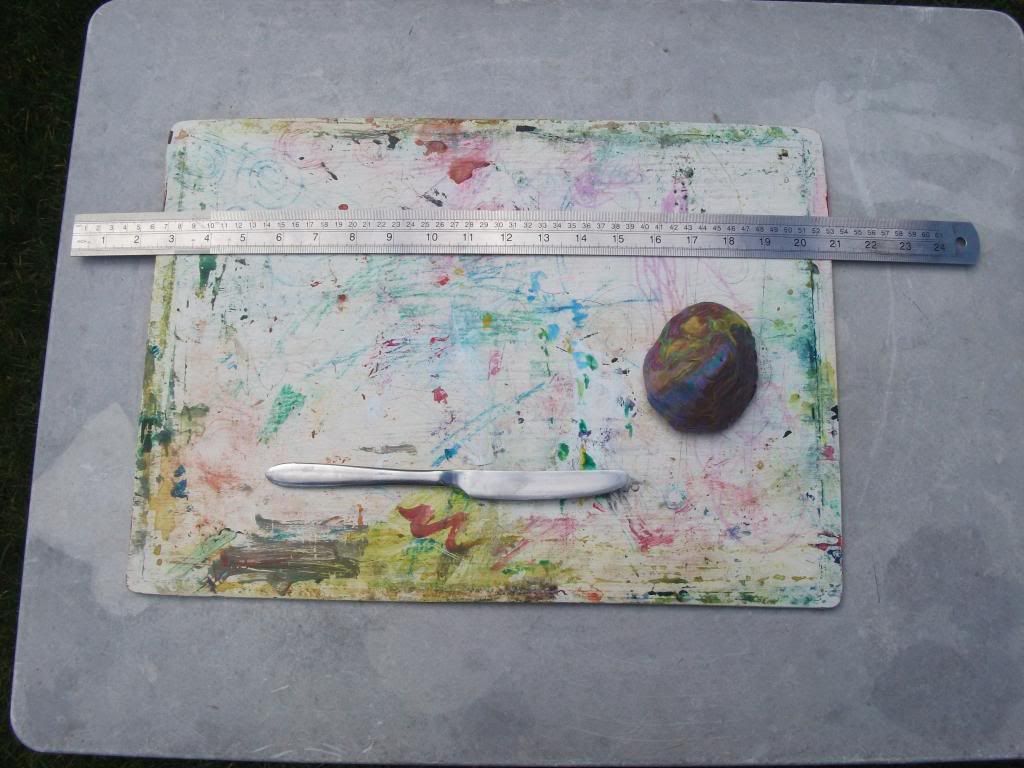
Kit List
1 asymmetrical plasticine hill (a shade over 6 cm tall)
1 board (bread board is fine but maybe cover in plastic if you don't like plasticine in your sandwiches)
1 ruler
1 dining knife
Measure 1 cm and place knife.
The hill here already has all the lines in place as I was too lazy to start over for the photos. You can also see that in the time since the hill was made there's been some geological movement with the lines.")
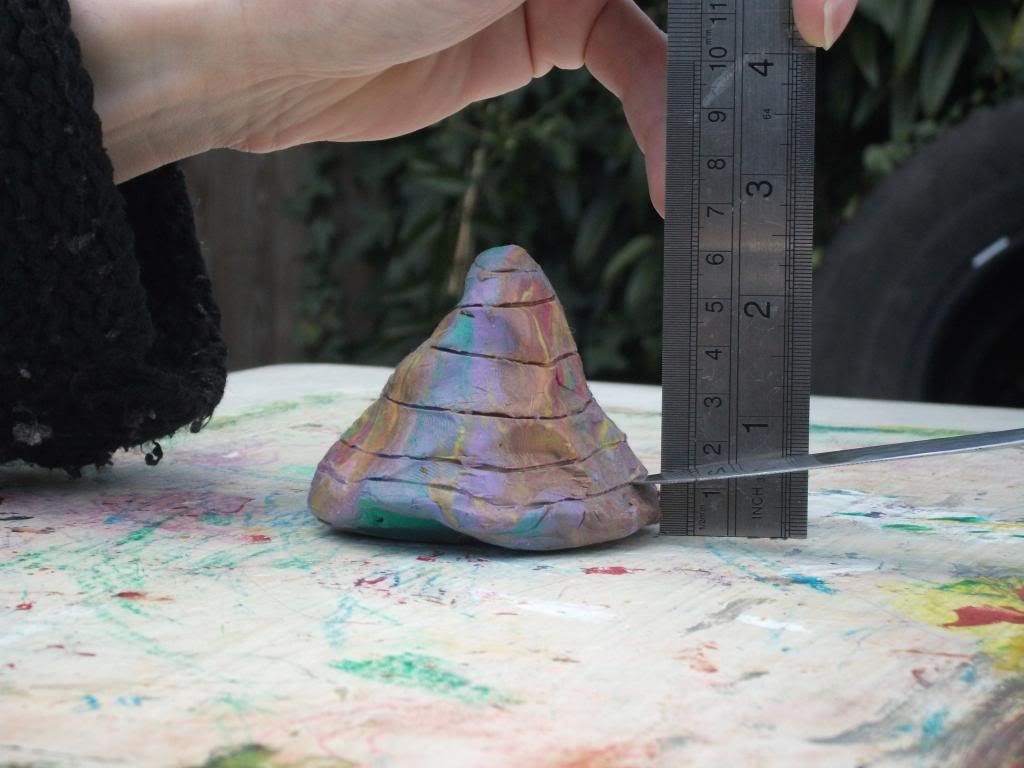
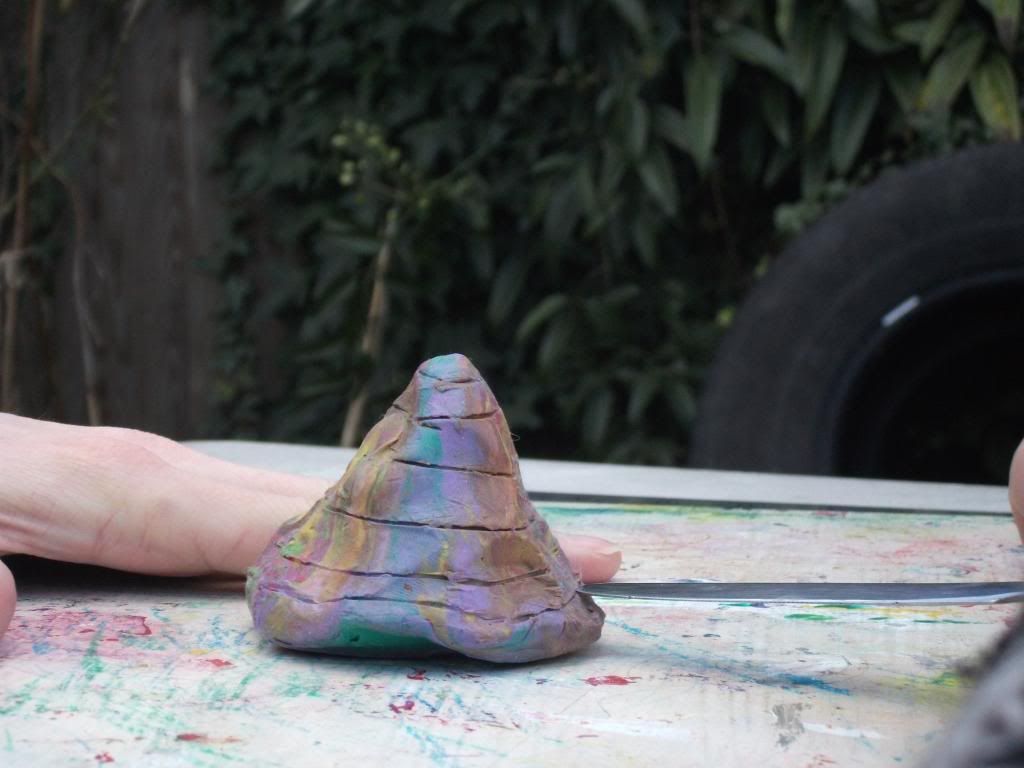
With the knife held in place rotate the board with your other hand until there's a line all the way round.
Move 1 cm up and repeat until you run out of altitude.
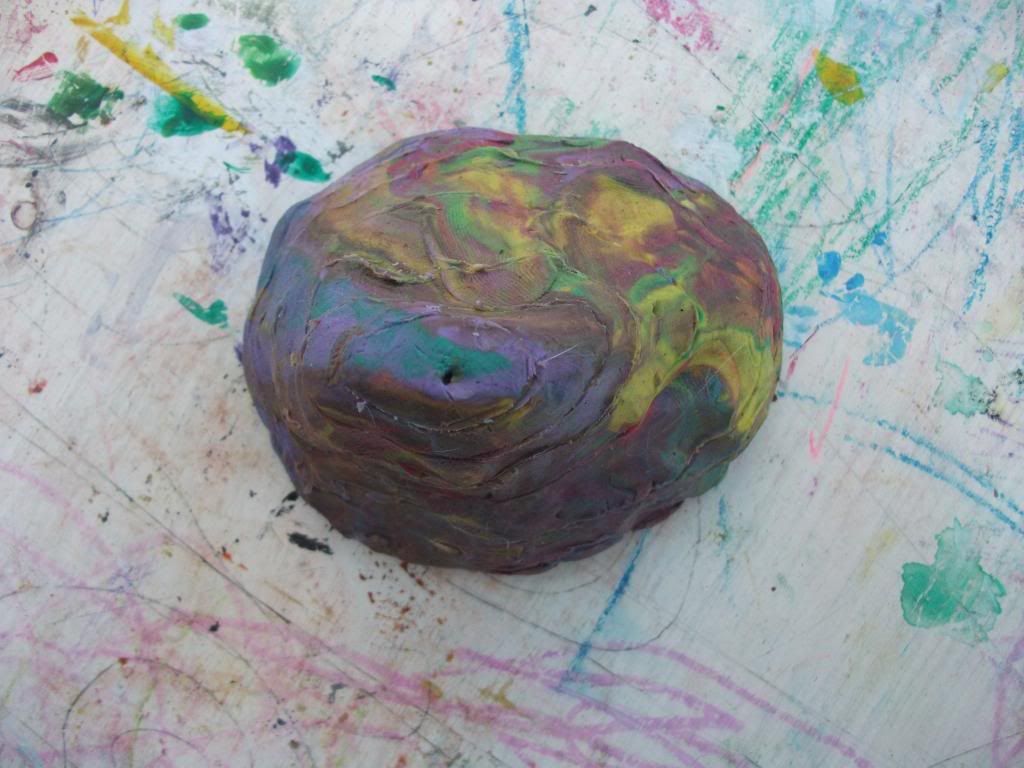
When looking down from above you will see the contour lines. Hopefully a bit better than the photo.
If the contour lines are as obvious as they could be, then turn the knife blunt side down and go round the lines pushing back the "overhang".
Now you can get junior to look down from above and copy down the lines on to paper adding numbers 10, 20, 30...
Having drawn their own map (and maybe built their own hill) the relationship between the lines and the shape of the hill should be a lot clearer, but it will also be easy to point out the various aspects like close lines = steep incline.
At this point you can see why the hill is asymmetrical, it will actually help with the various aspects and make more sense than an even hill.
Kit List
1 asymmetrical plasticine hill (a shade over 6 cm tall)
1 board (bread board is fine but maybe cover in plastic if you don't like plasticine in your sandwiches)
1 ruler
1 dining knife
Measure 1 cm and place knife.
The hill here already has all the lines in place as I was too lazy to start over for the photos. You can also see that in the time since the hill was made there's been some geological movement with the lines.
With the knife held in place rotate the board with your other hand until there's a line all the way round.
Move 1 cm up and repeat until you run out of altitude.
When looking down from above you will see the contour lines. Hopefully a bit better than the photo.
If the contour lines are as obvious as they could be, then turn the knife blunt side down and go round the lines pushing back the "overhang".
Now you can get junior to look down from above and copy down the lines on to paper adding numbers 10, 20, 30...
Having drawn their own map (and maybe built their own hill) the relationship between the lines and the shape of the hill should be a lot clearer, but it will also be easy to point out the various aspects like close lines = steep incline.
At this point you can see why the hill is asymmetrical, it will actually help with the various aspects and make more sense than an even hill.