I wanted a way that I could make a pod for my hammock, that didn't have any drafty joins, wasn't attached permanently to my hammock (So I could use it in hotter climates as the standard hammock), and kept me warm underneath like an under-quilt does.
After a few ideas, I thought the way that suited me best was this...
(Ideally you need to be handy with a sewing machine, no idea how long this would take by hand!!!)
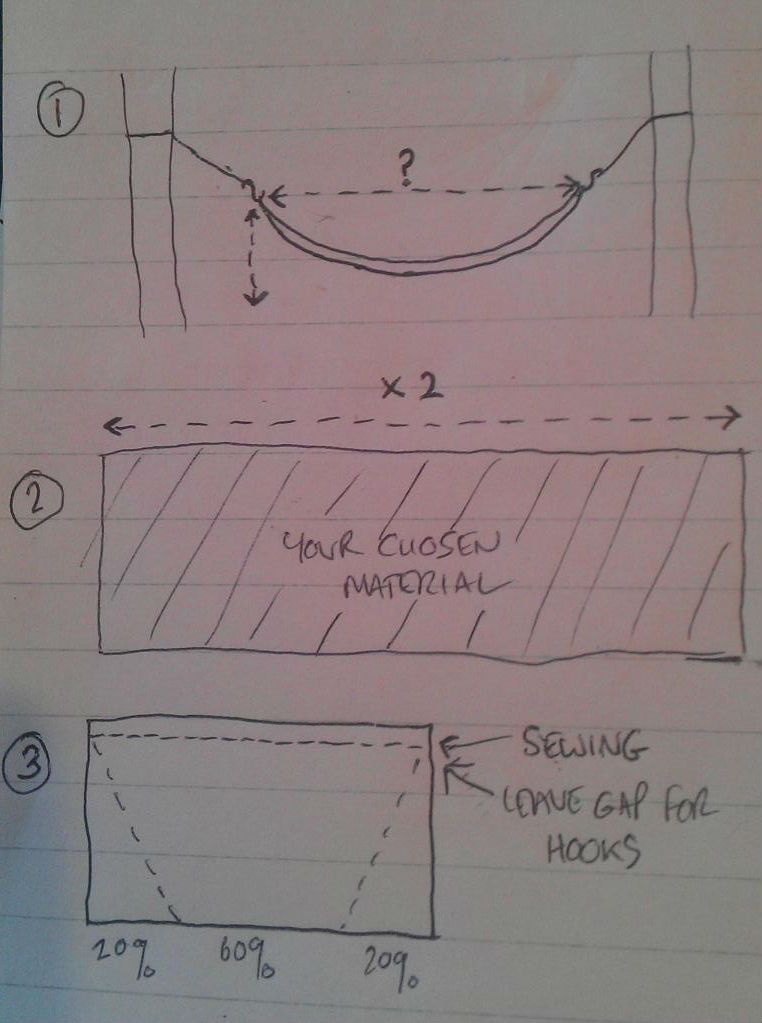
1) Set up your hammock on a few different trees measuring the gap between your hooks each time. When you're happy that the measurement isn't going to get any bigger take that measurement and jot it down.
Mine was 2.8 meters as I have a kingsize ticket to the moon hammock.
Measure from the hook to just above the ground too, my measurement was 1.4 meters so I called it 1.35 to allow .05 to be folded up at the bottom to run the shock cord through.
2) Choose your material, I went for DPM Breathable waterproof ripstop nylon.
Order double the length of your hook to hook measurement plus a bit more just incase your measurement increases if you set up somewhere different.
My measurement was 2.8 meters so I called it 3 meters across so I ordered 6 meters by 1.5 meters.
3) Fold in half along the longest measurement (Inside out for sewing), and sew along the top all the way.
Then take 15 - 20% of the length both sides at the bottom and sew down to those points (20% was just right for me).
It's not worth having the excess, it weighs more, is unused space and could catch any sideways rain and you don't want that if you didn't get waterproof material!
Leave a gap for the hooks to slide through at the top.
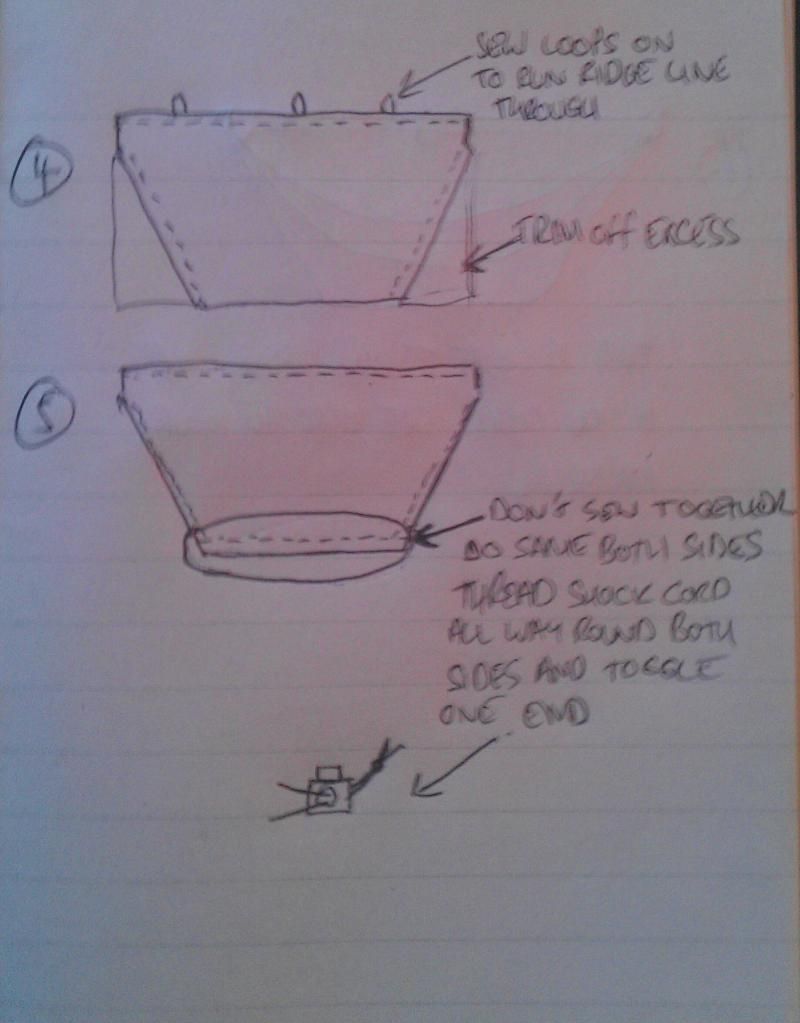
4) Sew a few loops on to run the guy-line through (Don't turn the top over completely, you want access to your line so you can tighten it if needed, I have a slip type knot so I can tighten and loosen it as needed, once you turn the pod the right way the loops will be on the inside).
Trim off the excess from the sides.
5) Now at the bottom, separate the material as you don't want to sew the bottom together otherwise you won't be able to get in, and fold a few cm up and sew all along the bottom both sides to create a tunnel that you can run the shock cord through.
Run the shock cord through and put a toggle on the end where the two ends meet so you can tighten it right up at night.
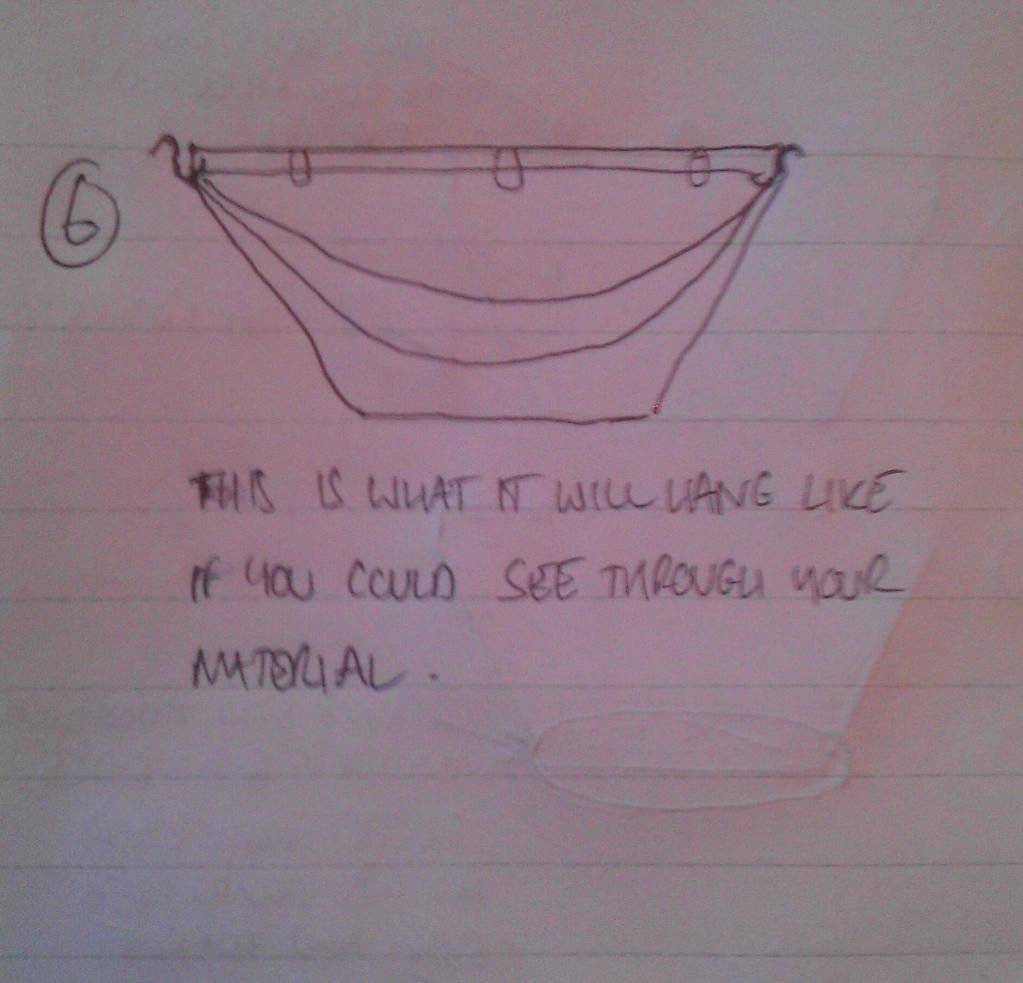
6) Turn the material back the right way now and you're done!
You can add windows etc. if you want and tweak to your liking.
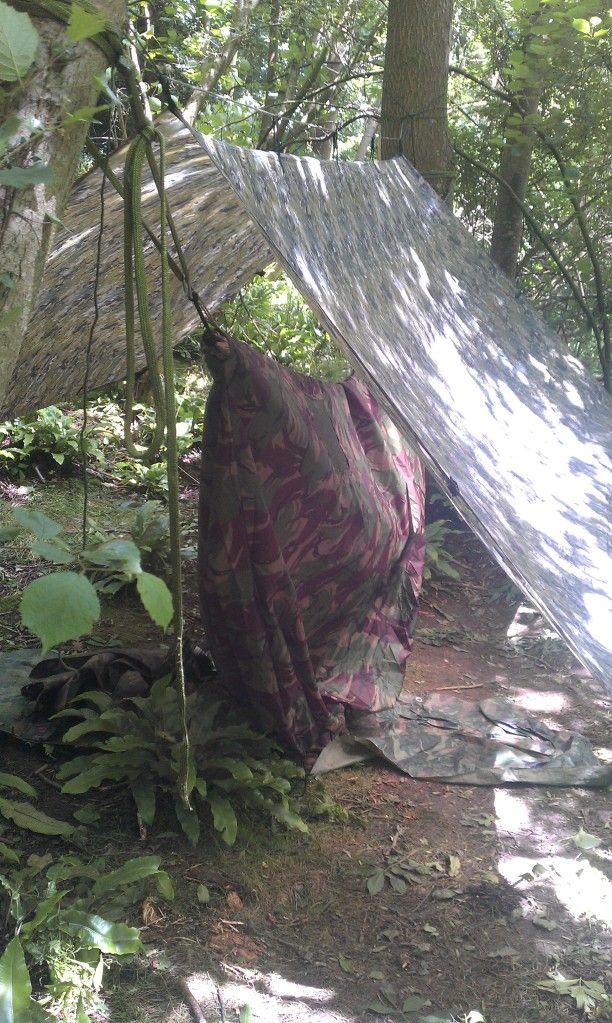
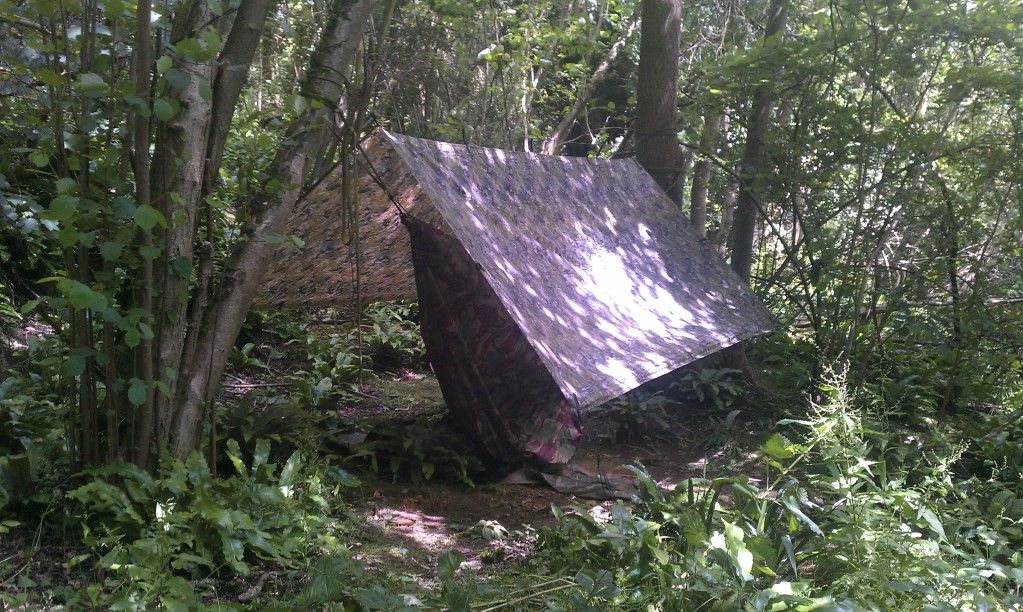
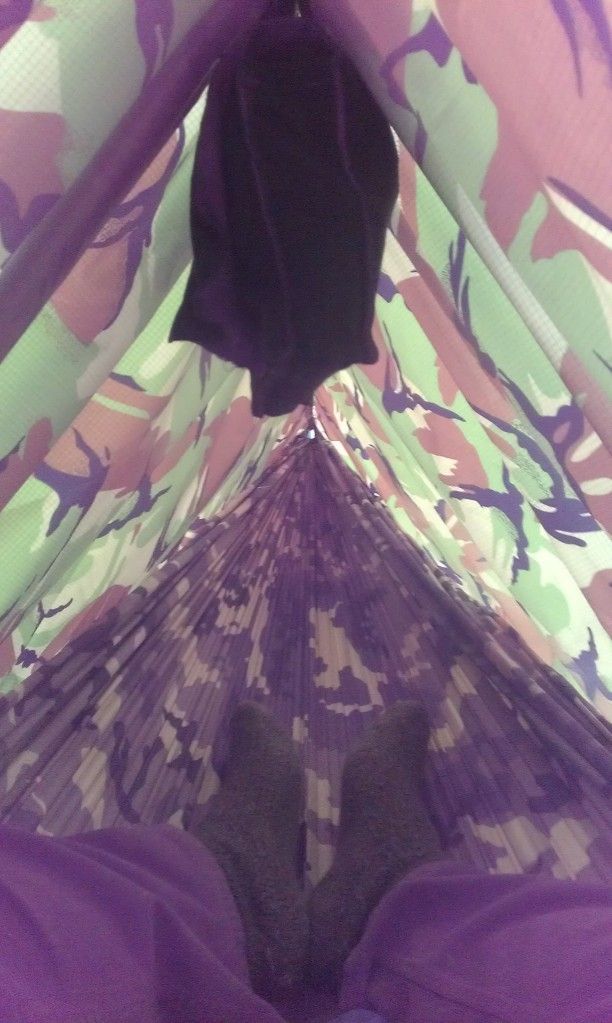
As you can see below, this is what mine is like, in the pictures it looks a bit loose and baggy at the bottom but this is because I'd just set up and I hadn't tightened my shock cord at the bottom yet. Tightening this a bit pulls it up off the floor and keeps an air bubble in the bottom to keep the underside warm.
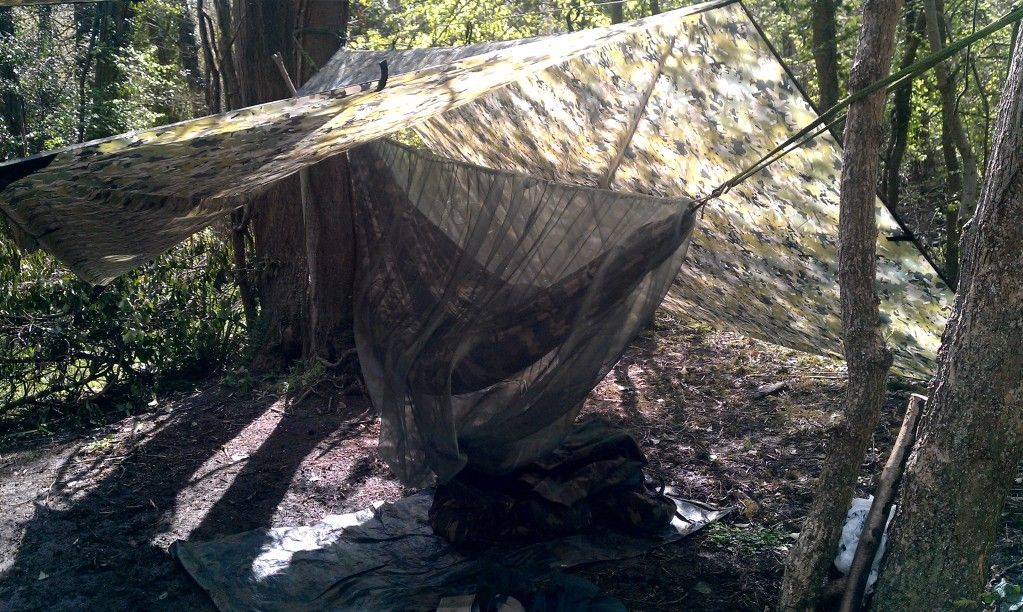
I have also added a window with mozzie net in, and a flap (Made from the side material excess), that I can toggle up to let fresh air in, or close down if it's cold or wet etc.
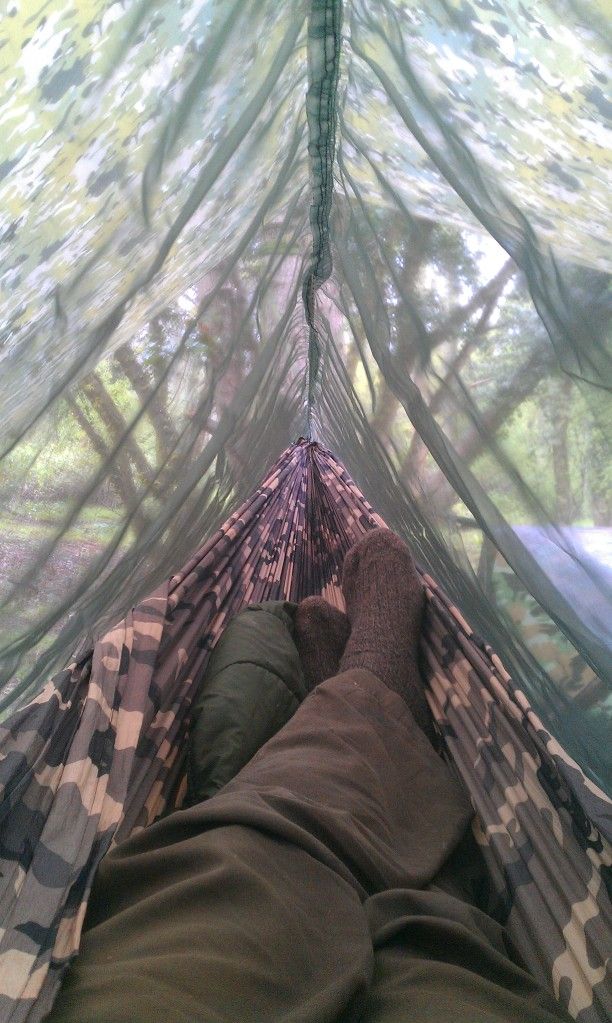
You can also see that I've made a mozzie net version in the same way, and you can also that if you don't want anything you don't have too, as you've not sew anything to your actual hammock")


After a few ideas, I thought the way that suited me best was this...
(Ideally you need to be handy with a sewing machine, no idea how long this would take by hand!!!)
1) Set up your hammock on a few different trees measuring the gap between your hooks each time. When you're happy that the measurement isn't going to get any bigger take that measurement and jot it down.
Mine was 2.8 meters as I have a kingsize ticket to the moon hammock.
Measure from the hook to just above the ground too, my measurement was 1.4 meters so I called it 1.35 to allow .05 to be folded up at the bottom to run the shock cord through.
2) Choose your material, I went for DPM Breathable waterproof ripstop nylon.
Order double the length of your hook to hook measurement plus a bit more just incase your measurement increases if you set up somewhere different.
My measurement was 2.8 meters so I called it 3 meters across so I ordered 6 meters by 1.5 meters.
3) Fold in half along the longest measurement (Inside out for sewing), and sew along the top all the way.
Then take 15 - 20% of the length both sides at the bottom and sew down to those points (20% was just right for me).
It's not worth having the excess, it weighs more, is unused space and could catch any sideways rain and you don't want that if you didn't get waterproof material!
Leave a gap for the hooks to slide through at the top.
4) Sew a few loops on to run the guy-line through (Don't turn the top over completely, you want access to your line so you can tighten it if needed, I have a slip type knot so I can tighten and loosen it as needed, once you turn the pod the right way the loops will be on the inside).
Trim off the excess from the sides.
5) Now at the bottom, separate the material as you don't want to sew the bottom together otherwise you won't be able to get in, and fold a few cm up and sew all along the bottom both sides to create a tunnel that you can run the shock cord through.
Run the shock cord through and put a toggle on the end where the two ends meet so you can tighten it right up at night.
6) Turn the material back the right way now and you're done!
You can add windows etc. if you want and tweak to your liking.
As you can see below, this is what mine is like, in the pictures it looks a bit loose and baggy at the bottom but this is because I'd just set up and I hadn't tightened my shock cord at the bottom yet. Tightening this a bit pulls it up off the floor and keeps an air bubble in the bottom to keep the underside warm.
I have also added a window with mozzie net in, and a flap (Made from the side material excess), that I can toggle up to let fresh air in, or close down if it's cold or wet etc.
You can also see that I've made a mozzie net version in the same way, and you can also that if you don't want anything you don't have too, as you've not sew anything to your actual hammock
Last edited:
 Yup I can see how you did it. Thanks for that tutorail. Copied and saved to file for future reference.